


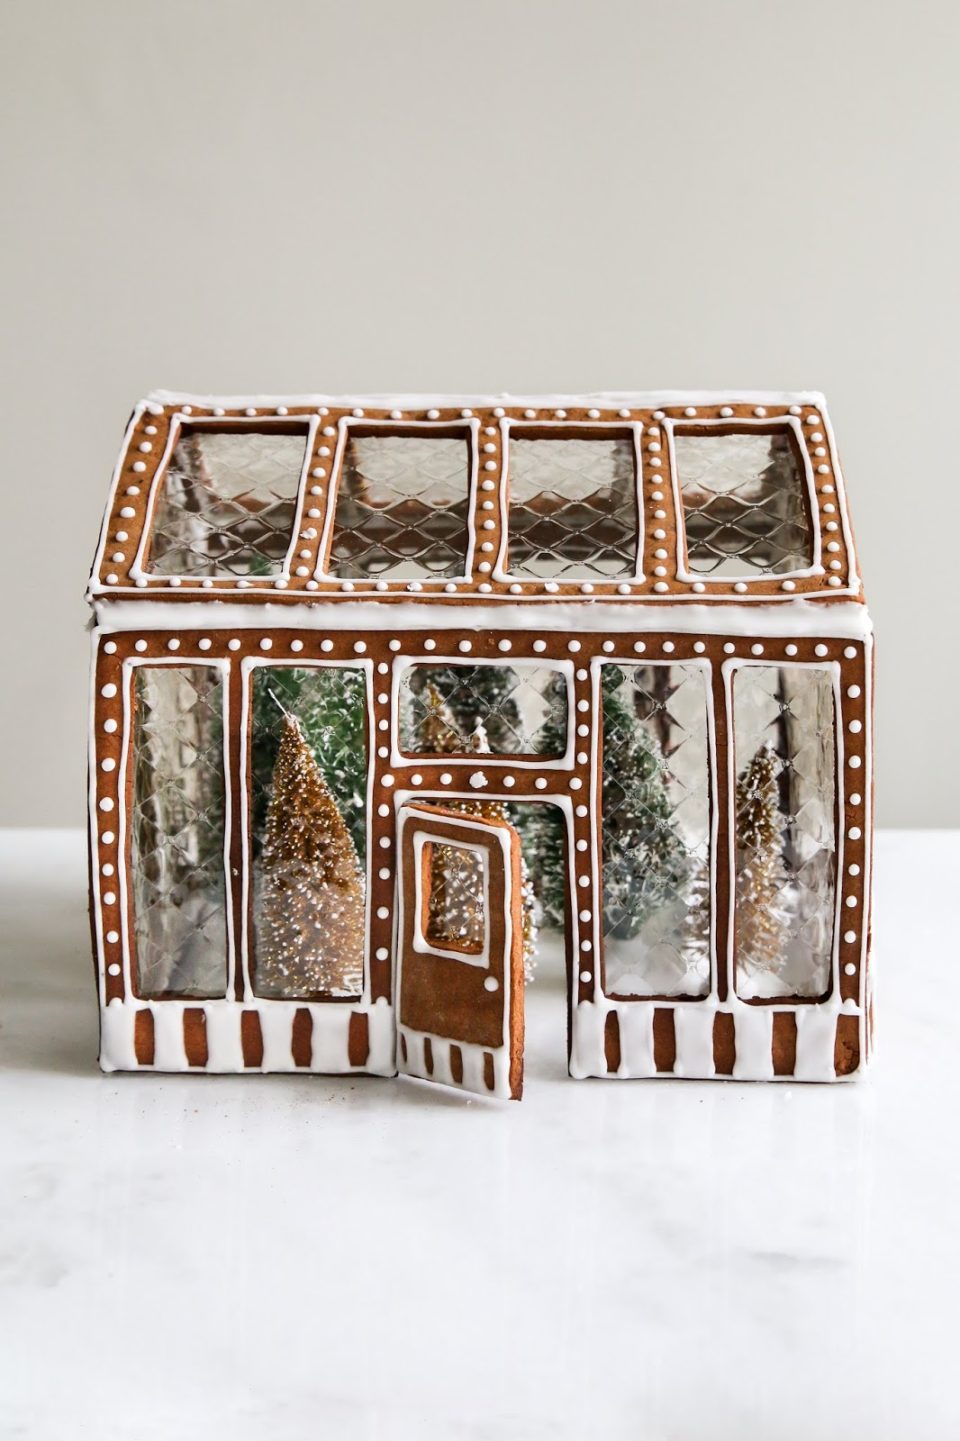
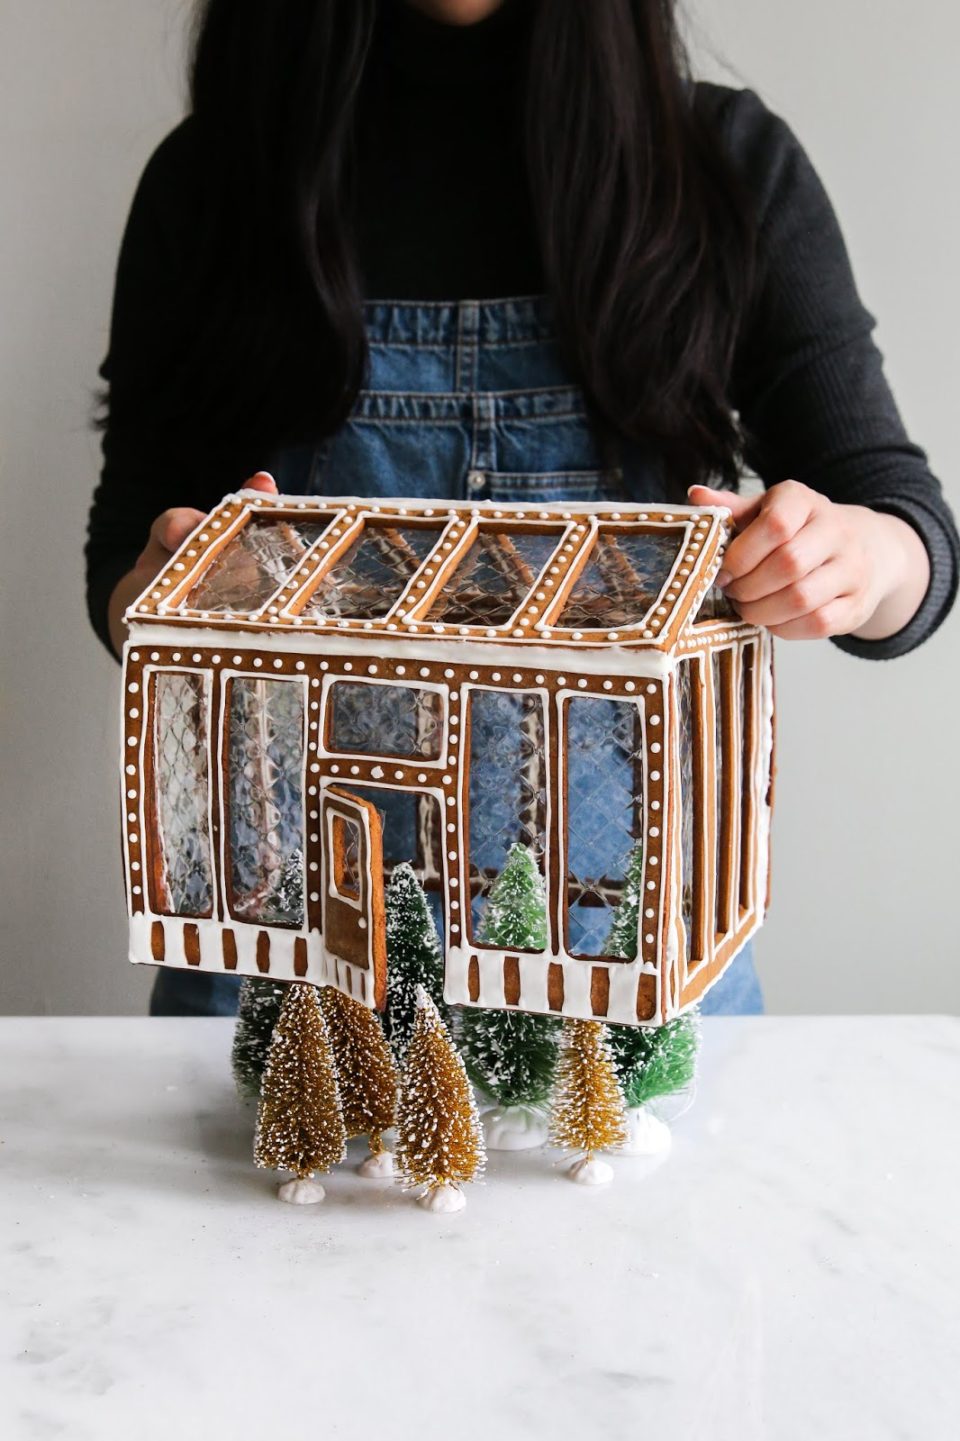
It is almost Christmas! I feel like there is still so much holiday baking I want to do before Wednesday but I might have to accept that there are less than 48 hours to cover cookies in green and red sprinkles and say I am done Christmas baking for this year. It makes me a bit sad to wrap up holiday baking every year. I live for holiday baking and I think I did pretty well this year. In the month of December, I made a fully edible cookie advent calendar, all of Bon Appetit magazine’s Christmas cookies, all of New York Times’ holiday cookies with a help of a friend, put together a Vancouver cookie gift guide, this shaker cookie (!!), and this gingerbread greenhouse that many of you seemed to love. To end holiday baking 2019 with a bang, I am sharing a tutorial on how to build your own gingerbread greenhouse, aka a great way to spend Christmas Eve or Christmas Day.
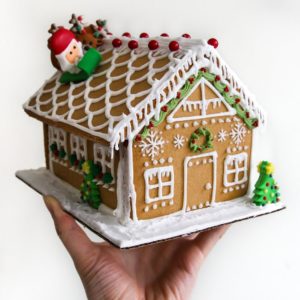
Before I share all the tips, tricks, and measurements for this greenhouse, I must preface it with the fact that I have never built a gingerbread house from scratch. If you have specific techniques that you have been using for years that I am missing here, please do share them with me. I would love to learn. Prior to this gingerbread greenhouse, all the gingerbread houses that I have made have come from kits from the craft store or grocery store, which I swear never have enough icing to hold the thick slabs of stale gingerbread together. They also only include six gummies and nine smarties for one to decorate half a roof. And since we are all about complaining, my last complaint is that the corners of those gingerbread cookie slabs are always rounded and never create the peeeerfect sealed edge. It. Drives. Me. Insane.
Back to the gingerbread greenhouse. It takes time and a bit of patience to make. You want to set aside some time for it. From start to finish, it took me about 8 hours (I started at 3am and finished at 11am because I am insane), BUT I did run out of parchment halfway through and had to wait for each piece of the house to bake and cool before I could use that same piece of parchment for another tray. If I was able to do two trays at once with enough parchment paper, I would assume that this would take about 4 – 5 hours. Still quite a bit of time, but not so much that it would make you go crazy the day before Christmas.
Besides the ingredients needed for the gingerbread dough itself, there are not too many other things required to build this greenhouse. What you need for this entire project are:
Gingerbread Greenhouse
Ingredients
- A sturdy gingerbread dough, I used this one from Food52* and made 3/4 of the amount, which was perfect for this house. I reduced the amount of dough because I knew I needed less due to all the window cut-outs.
- A tape measure or long ruler
- Gelatin sheets, for the windows
- Royal icing, for decorating
Instructions
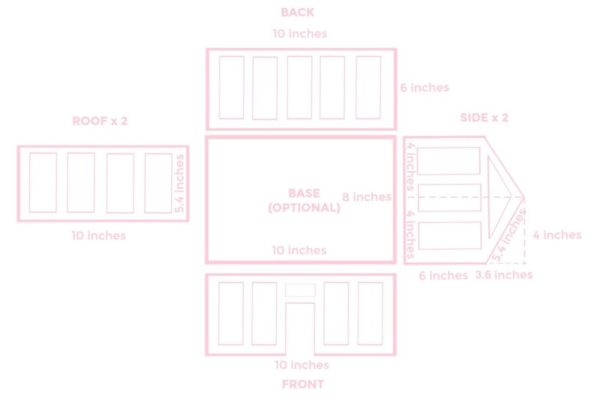
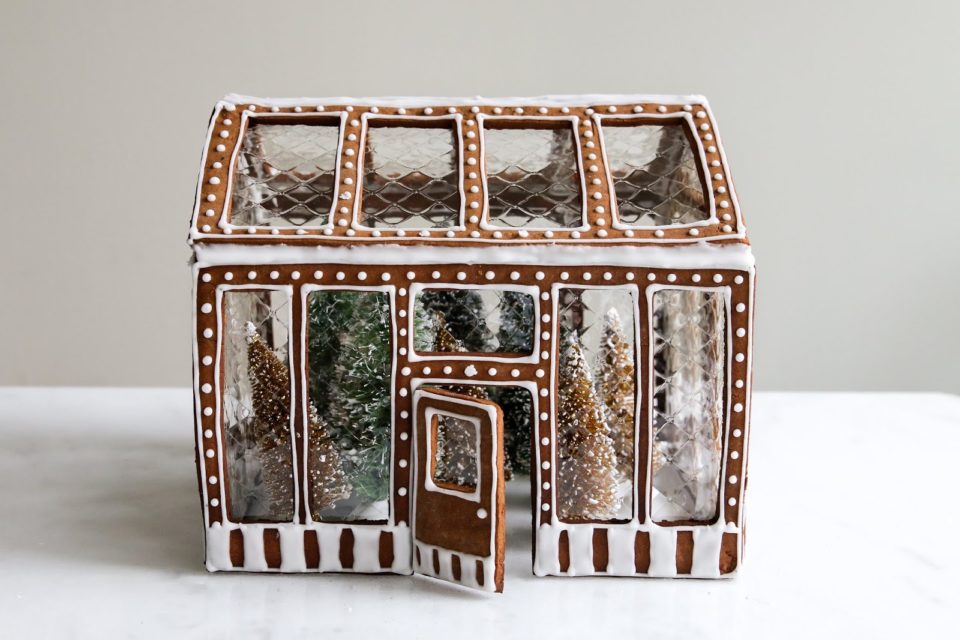
- The hardest part of making this gingerbread greenhouse is figuring out the measurements. How big do I want the house? If I made the window cut-outs too big, will the frames snap really easily? How long should the slope of the roof be? Do I really need to do some a2 + b2 = c2 to figure it out? Yes. BUT, I have done all of the math for you. I suffered from 2:30am to 4:00am figuring out all my measurements and dimensions so when you make this, you will have lots of fun and lots of fun only. Pleasure excuse the terrrrrrible diagram but I thought this would be the easiest way to explain all the measurements. You want to have six pieces of gingerbread for the structure (two sides with pointed tops, one back, one front with door, and two pieces for the roof). Seven pieces if you want to have a base for the house. The reason why I made the base optional is because it is much easier to place little decorations and plants inside the house if you leave it open. If you do use a base, note that once you seal the house by putting on the roof, what is inside the house will stay there and you cannot go back and change it. The gingerbread greenhouse is plenty sturdy even without the base.
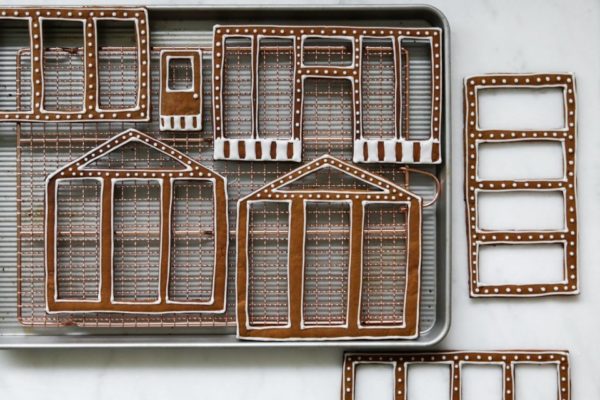
- The dimension of the house is 10 inches by 8 inches and it is 8 inches tall at the highest point (with the two roof panels meet). You can make the cut outs for the 'glass' as wide or narrow as you like but keep in mind that the wider the glass panels, the thinner the frame, the more delicate it will be. It is also very important that you make all your cut-outs with chilled dough. Soft, sticky dough will not want to retain its shape when being trimmed and you want make the glass window cut-outs once the trimmed dough has already been transferred to a line baking sheet. It is impossible to transfer a piece of gingerbread dough that has all its windows cut out already unless you chill it until its completely frozen. For example, I trimmed the back panel to 10 x 6 on a sheet of parchment and then lifted the parchment paper onto the baking sheet, THEN measured and cut out the window panels.
- This step is optional but I like to pop each tray into the freezer for at last ten minutes before they go in the oven so that the dough can firm up a bit to reduce the amount of spreading when baking. We do not want all our hard work of measuring and trimming to go to waste.
- Once the dough is chilled, pop the trays into the oven preheated to 375F and bake for 7 – 9 minutes. Allow the baked pieces to cool on the baking sheet for at least 15 minutes before moving it to the cooling rack to cool completely. When the pieces have cooled, use a simple royal icing to draw designs and add any details on the panels.
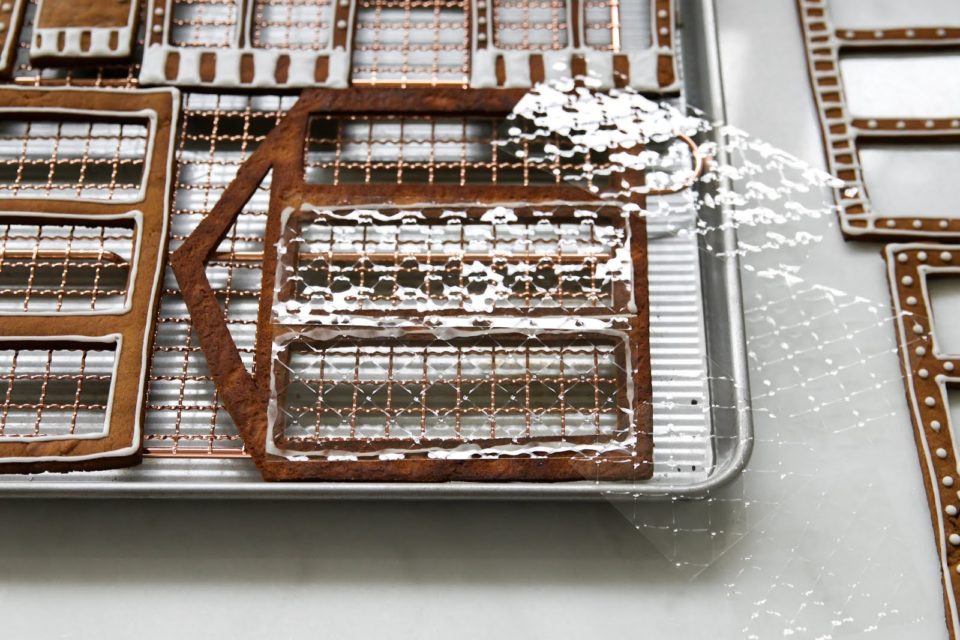
- After the royal icing has dried and set, flip each piece over and use the remaining royal icing to attach the gelatin sheets to the back of each cut out. You will have to trim the gelatin sheets to make them fit the side panels with the pointed top.
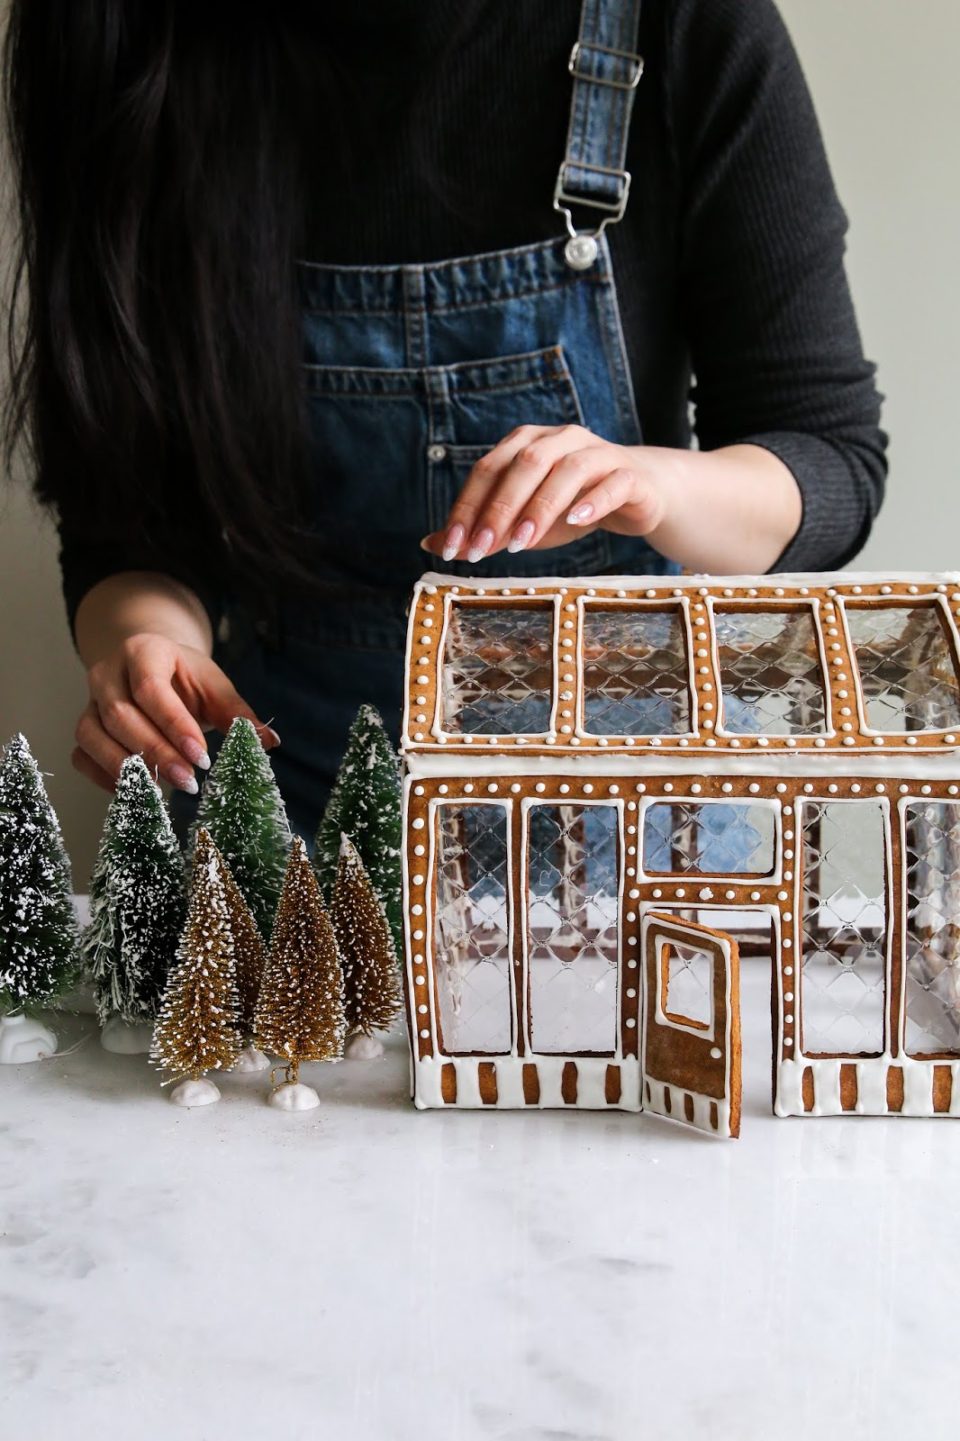
- When you are ready to assemble the house, have a few cans of soup or anything heavy that you can use as wall support while the icing is drying. Squeeze a row of icing on the short edge of each side piece (with the pointed top) and attach to the back and front pieces. If you made a base for the house, attach the bottom edge of all four wall pieces to the base and add any decorations you want inside the house before attaching the roof. Attach the roof, one piece at a time. Add additional icing to any seams that might have a gap. Wait for the house to be dry before moving it.
- Add additional decor or fairy lights your house is Christmas-ready! The house does require time and patience but to me, the result is definitely worth all the effort. I hope you all have a wonderful holiday season and if you do make gingerbread greenhouse, please tag me or show me a photo! I would love to see your take on the classical gingerbread house. Have fun!
Notes

Happy holidays!


Anne says
Oh wow this is beautiful and so unique. Thank you for sharing with us.
jackman10 says
Other types of installations include digging out a sunken floor that aid in retaining heat during colder months. Maybe you want a full concrete slab under your greenhouse with a slightly sloped floor and floor drain set up. You can build a knee wall around the perimeter of the greenhouse and build on top of that wall, which also gives you more headroom inside. Greenhouses need to have good drainage on the inside and the foundation you use needs to address this. Keep in mind that some of these installations are considered temporary and others are permanent. You need to check your local building codes to see if a permit is required for your type of installation. Greenhouse Kits
Alex says
But what size are the windows? 🙂
Molly Stingley says
very cute!